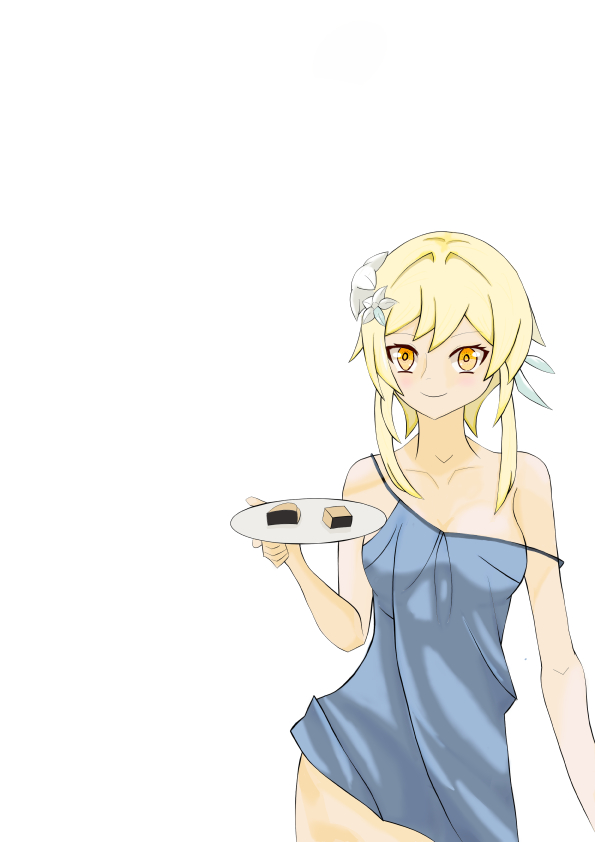
Hello, Sumine here! This time I created a Lumine fanart illustration from the game Genshin Impact.
You can see my step-by-step process of making this digital art from start to finish.
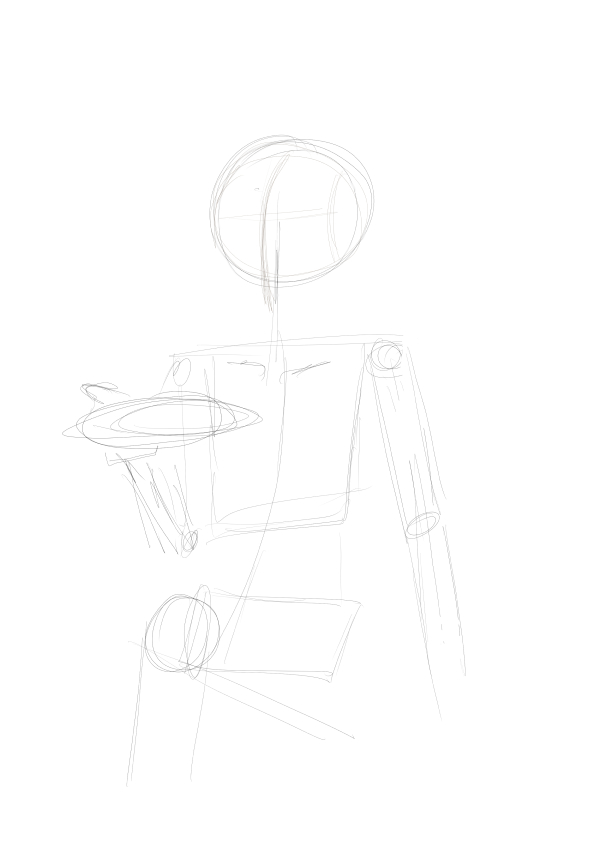
Sketch
In the sketch phase, I divided the drawing into several sections to make it easier to structure the sketch. Here, I used a Pencil Brush on a Raster Layer. I chose a raster layer because it makes erasing simpler and looks more natural.
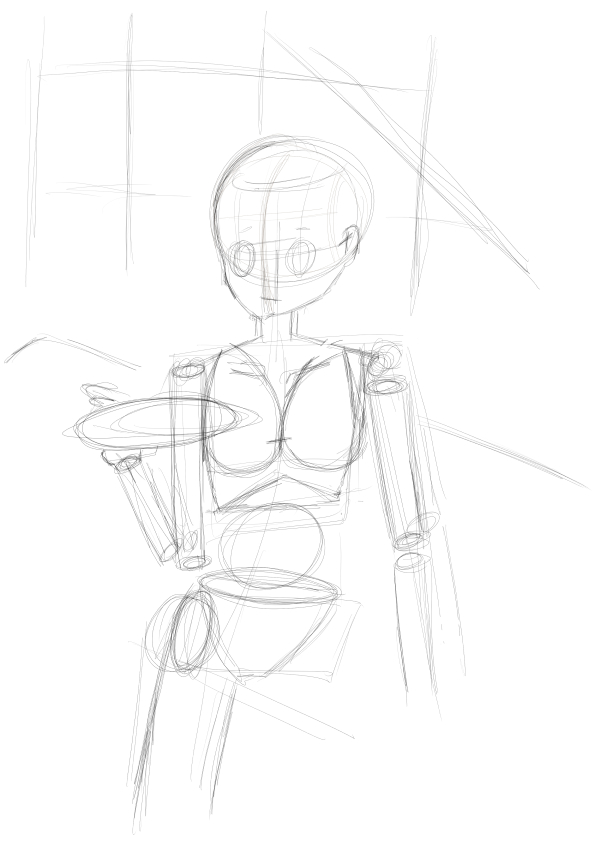
Building Block
At this stage, I used simple building blocks as the foundation of the illustration.
As you can see in the illustration above, I only used 2D shapes. The goal was to get the right proportions before moving to the next step.
3D Shapes
Once the 2D shapes felt proportional enough, I developed them into 3D forms. This made the rendering process much easier later on.
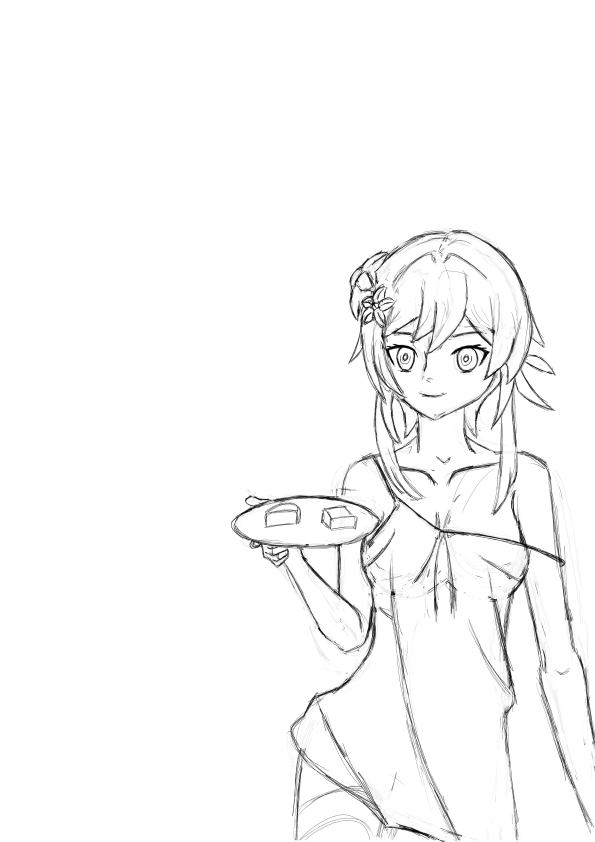
Detailing the Sketch
After the 3D structure was ready, I moved on to sketch detailing. Here, I added details such as hair, eyes, fingers, clothing, and more.
I also shifted the character slightly to the side to match the reference I was using.
You may notice that I sketched a background in the earlier step, but I didn’t continue with it here since I still lack background drawing techniques.
Line Art
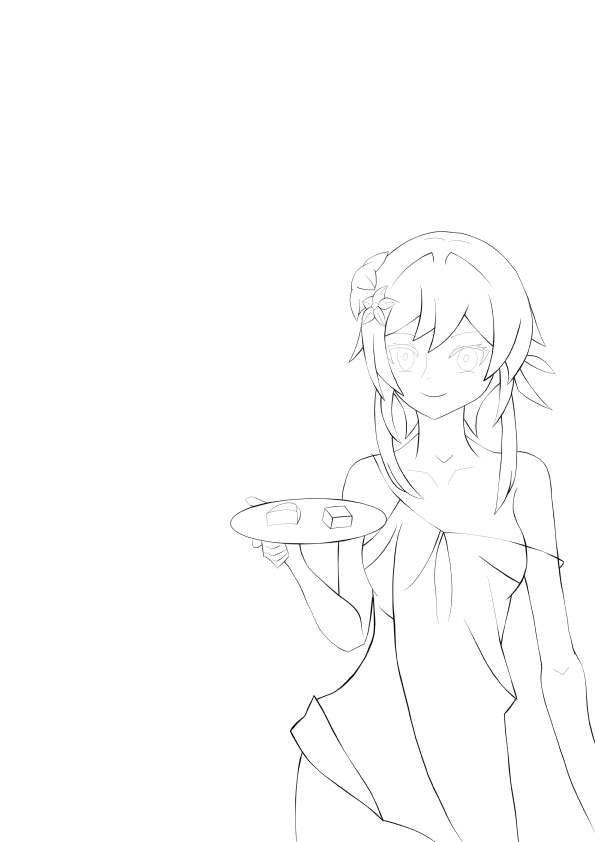
Once the sketch was complete, I moved on to the Line Art stage. Here, the mindset shifted from drawing freely to creating clean and refined lines.
I used the Gpen brush on a Vector Layer. This helped me adjust line thickness easily when applying line weighting.
There isn’t much theory in this stage—just tracing the sketch carefully and adding line weight where lines overlap.
Coloring
After finishing the Line Art, I moved on to the coloring process.
For coloring, I went back to using the Gpen brush on a Raster Layer to achieve solid and clean colors.
Base Color
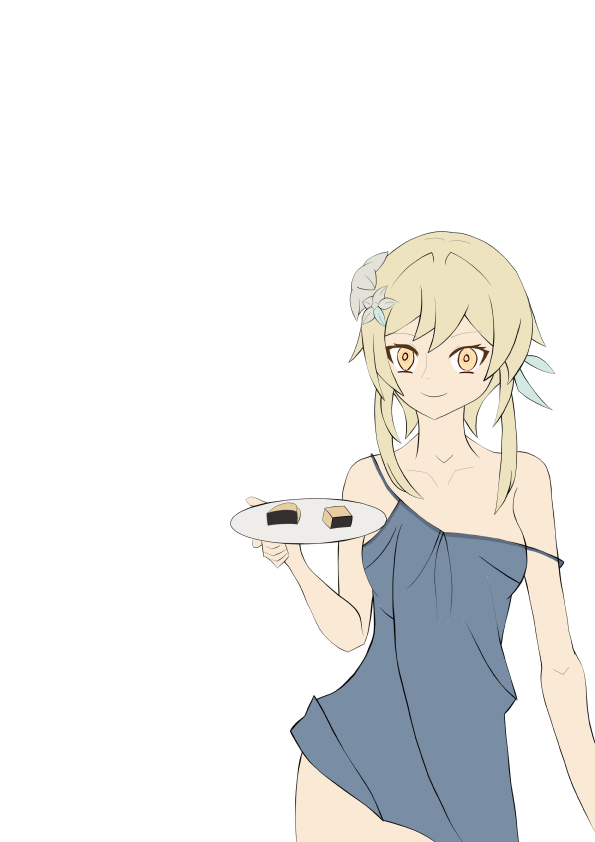
I started by applying base colors to each accessory and body part.
First Shadow
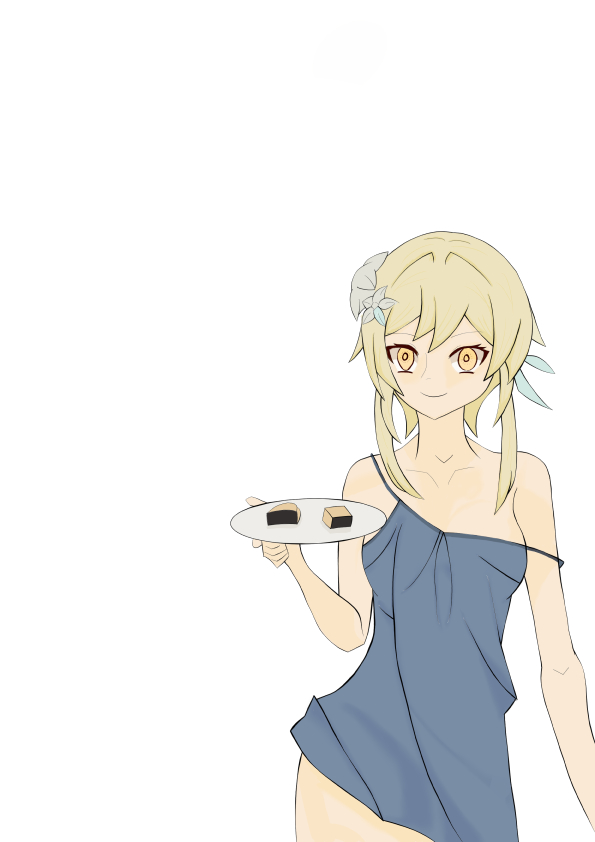
For the first shadow, I added depth using a tone about 10% darker than the base color.
I drew the shadows using Gpen with the Color Burn blending mode, then smoothed the edges with the Blend tool so the shadows wouldn’t look too harsh.
Second Shadow
For the second shadow, I estimated the tone to be 10%–20% darker than the first shadow but not completely black.
I applied it using the same technique as the first shadow, with Color Burn blending.
Highlight

For highlights, I used the Multiply blending mode with brightness increased about 10% from the base color.
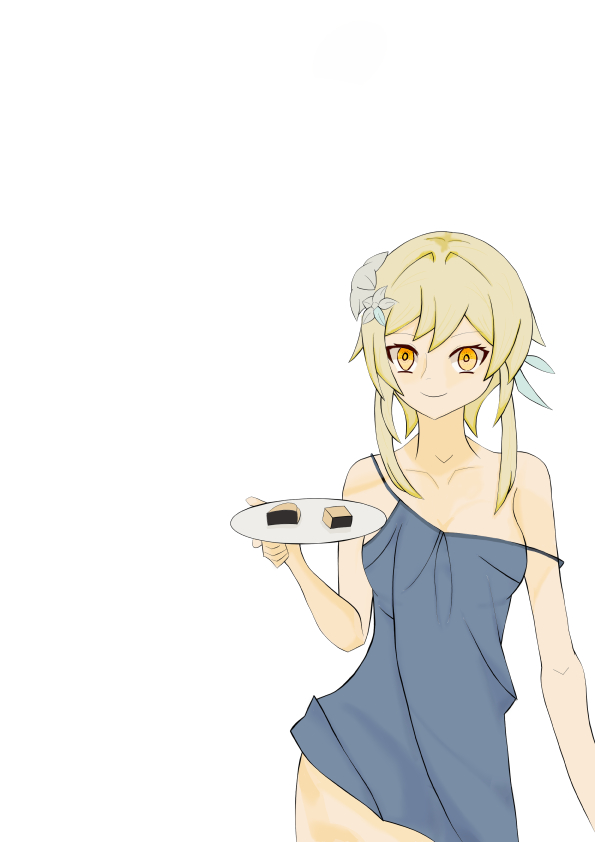
Final Detailing

In the last detailing step, I only added a blush effect to the character.
Final Notes
For this Lumine fanart illustration, I used:
- Device: Samsung Tab S10 FE
- Software: Clip Studio Paint Pro
- Reference: Pinterest
- Character: Lumine from Genshin Impact
Thank you for reading my blog! See you again in my next illustration.
Kritik Pribadi
Warna
penggunaan linear color burn untuk shadow kurang bagus jadi harus di gabung dengan layer dengan mode blend yang lain sperti Darken atau Color burn
Pakaian
Untuk shading pakaian sudah oke meskipun sebelumya shadow 2 ditambahkan ke bagian pakaian tetepi setelahnya di hapus karena shadow terlalu gelap
sejujurnya ketika membuat pakaian setiap line di warnai dengan Shadow #1 dan Shadow#2 tetapi saya berkesperiment dengan warna dan imajinasi saya sendiri. Ini adalah ketidak sengajaan
Wajah
Ketika membuat line art wajah masih kaku dan harus banyak mengulang garis .
bagian mata masih belum proporsional Harus latihan bentuk mata dari depan samping dan teknik menggambarnya dan terakhir color dan shading
ketebalan garis masih belum seimbang
rambut sudah oke outlinenya sudah ada perkembangan tebal garis belum seimbang detailing kurang

Tinggalkan komentar